LISTENING TO KATRINA - PREPAREDNESS
PROJECTS
THE CONTENTS OF THIS PAGE ARE RATED 'G' AND ARE
SUITABLE FOR ALL AUDIENCES

LIFE GOES ON BAG - WINDOWS BACKUP
PRINT
THIS PAGE
Workbook
page: None
Listening to Katrina companion
page: HYST - Documents
Now that your External Hard Drive is configured for use, let's talk about using backup software. If you are using the Windows operating system, then you already own this software - you just need to learn how to use it.
The first thing to do is create a logical date folder to contain your redundant backup sets. There are actually two different kinds, so lets start with the first kind. I call it the Initial System State backup. You will only need to do this once. It's an insurance policy against viruses and other errors that may be introduced into your computer over time. You won't ever actually do anything with the Initial System State backup unless you know what you are doing. If you have it, though, a qualified computer technician may be able to use it to 'rescue' your computer if it ever goes wonky.
[WONKY: adjective : wən-key : Strange, odd, or abnormal. After 'Willy Wonka', a fictional character.]
 Go
ahead and connect your External Hard Drive. Create a logical date
folder under your BACKUP folder.
Also create an Initial System State folder.
Go
ahead and connect your External Hard Drive. Create a logical date
folder under your BACKUP folder.
Also create an Initial System State folder.
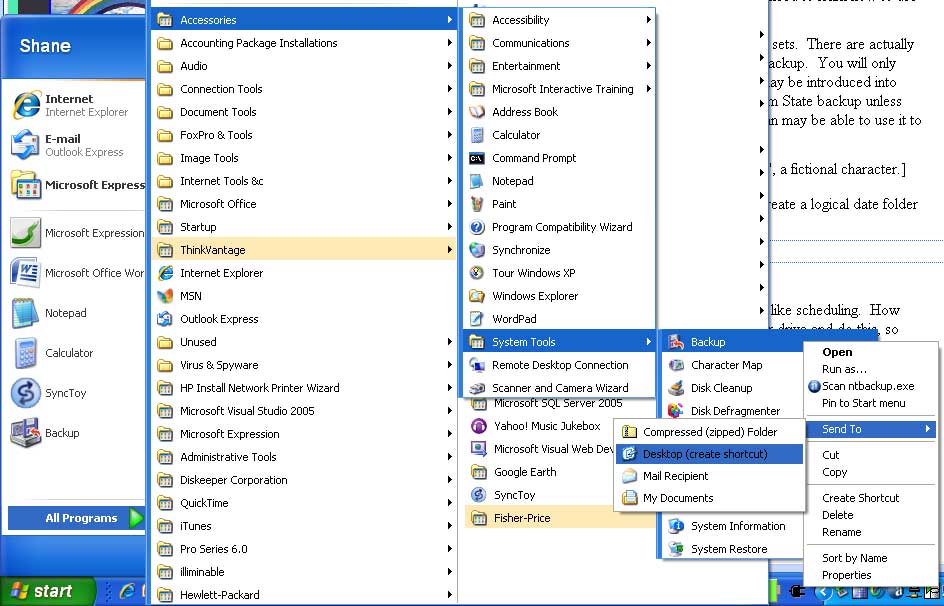
Ready? Good. Go ahead and close all open applications. Now let's fire up the Backup software. I like to create a shortcut on the desktop so that it's easy to find because the Backup is buried in the Windows structure. Let's do that now. I have created an image here that will show you exactly where it is. If you click on the START button in the lower left corner of your screen, it's under ALL PROGRAMS - ACCESSORIES - SYSTEM TOOLS - BACKUP. If you right click on BACKUP and select SEND TO then DESKTOP (AS SHORTCUT), a shortcut will be created on the desktop for the Backup software. You can start it from the menu or from the desktop. Go ahead and start it.
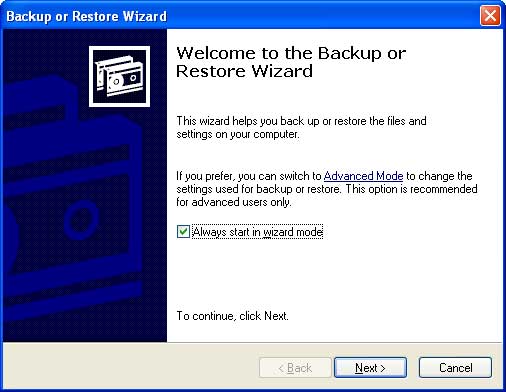 The
BACKUP OR RESTORE WIZARD screen will open. Uncheck the 'Always start
in wizard mode' checkbox and click
Advanced Mode.
The
BACKUP OR RESTORE WIZARD screen will open. Uncheck the 'Always start
in wizard mode' checkbox and click
Advanced Mode.
Welcome to the BACKUP UTILITY.
Click the BACKUP tab and we'll get started.
The image below shows an example of what you should be looking at. You can see the drive and folder structure of all the drives that are recognized by the Backup Utility.
We want to create a copy of our System State, so go ahead and check the box next to System State as shown in the example below.
Now click the little [+] sign next to the (C:) drive.

Now click the little [+] sign next to the (C:) drive. Select the check the box next to 'Documents and Settings', then scroll down and select the check box next to 'Windows' as well.
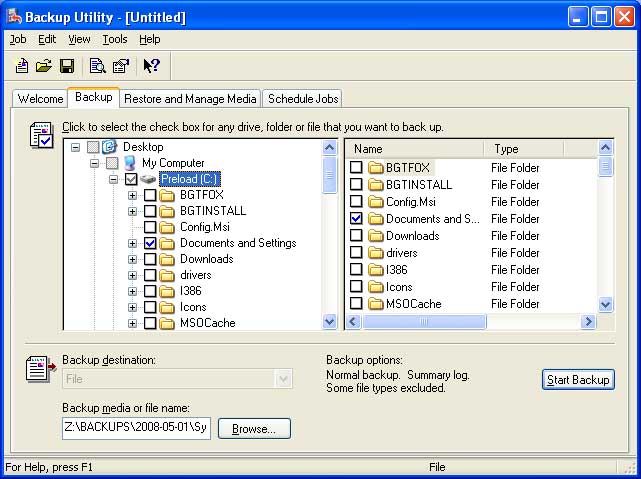
Click the BROWSE button at the bottom of the screen and locate your Initial System State folder on your External Hard Drive.
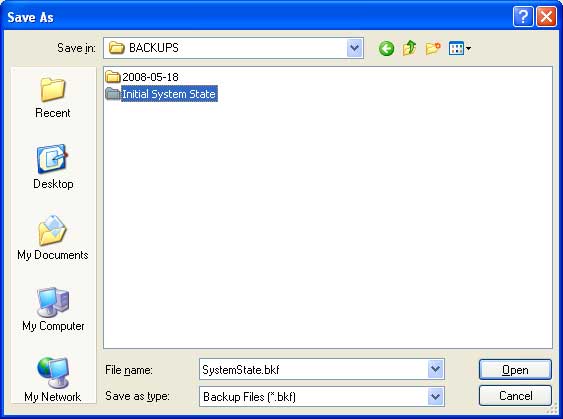
Click the OPEN button, and then SAVE and you'll see this, or something similar.

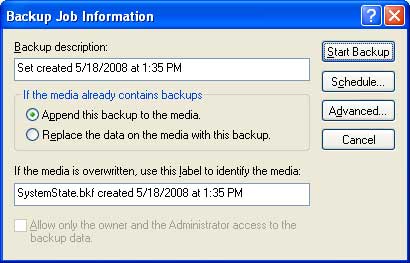 That's
it! Now click the START BACKUP button. You'll get a BACKUP JOB
INFORMTION SCREEN. Leave everything as it is and click the START
BACKUP button.
That's
it! Now click the START BACKUP button. You'll get a BACKUP JOB
INFORMTION SCREEN. Leave everything as it is and click the START
BACKUP button.
The BACKUP PROGRESS screen will appear, and the backup will run. This will take a few minutes, so go do something more productive than sit there and stare at the progress bar.
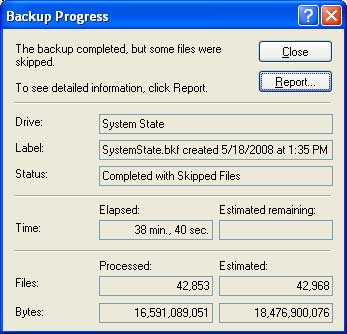 When
the backup finishes, you will see the 'backup completed' message.
Don't worry over skipped files. You can close this window when you are
finished absorbing what it's telling you.
When
the backup finishes, you will see the 'backup completed' message.
Don't worry over skipped files. You can close this window when you are
finished absorbing what it's telling you.
That's all there is to it. Now you have a copy of your Initial System State that is a kind of insurance against technological disasters involving your laptop.
The next thing to do is create a different kind of backup - one that you can run regularly to safeguard your data.
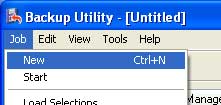 Since
the Backup software is open, let's go ahead and configure a repeatable
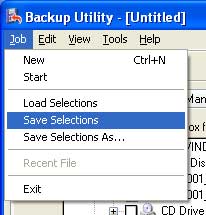
Backup job. At the top of the Backup Utility window, click JOB, then
NEW. That will clear the current selections so we can start fresh.
Since
the Backup software is open, let's go ahead and configure a repeatable
Backup job. At the top of the Backup Utility window, click JOB, then
NEW. That will clear the current selections so we can start fresh.
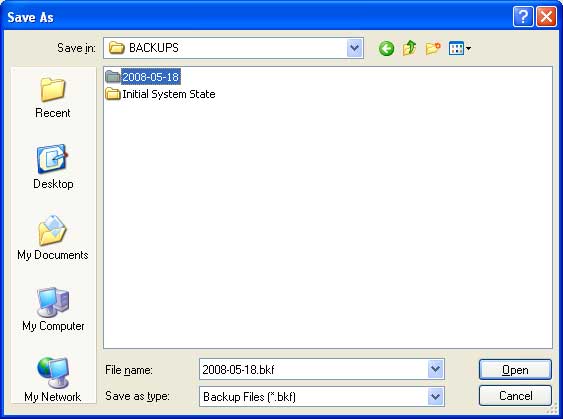
Click the BROWSE button at the bottom of the screen and find the logical date folder you created at the beginning of this page.
Change the file name to be the same as the logical date folder's name. Now click OPEN and SAVE.
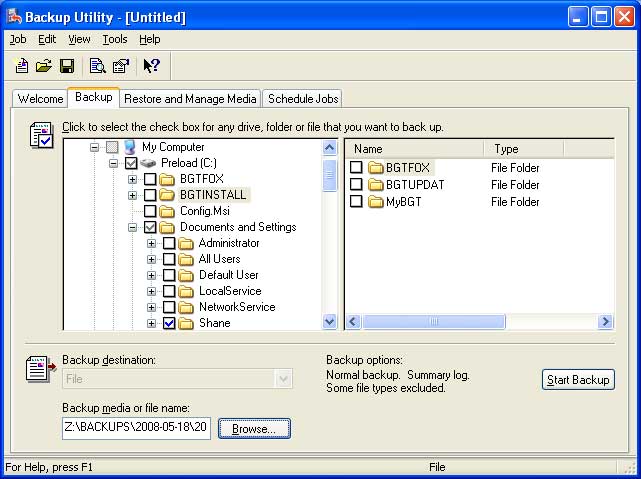
As in the example above, drill down into the C:\Documents and Settings folder by clicking the [+] sign next to that folder. Check the check boxes for each user on your computer - or if you are making individual backups, only that user for which you want a backup. In this example, I select Shane because that's the user name on this computer. (With all these Shanes, it gets kind of confusing. I should have thought about that sooner...)
Scroll down to the end of the list and select System State as well. This set of files is quite small, and they can be useful for system recovery should you ever need that.
I'm going to give you a choice at this point. You can use the Backup software to also back up your 'root' data store by scrolling down through the (C:) drive, finding it, and selecting it. I do not do this, preferring to make those copies manually. The Backup software creates a single file that can only be opened by the Backup manager. I like to be able to browse through those old copies sometimes looking for things. It's much more difficult to do that with the backup file because you must first load it into the Backup manager, and the restore the files you want to look through. (That lesson comes later.)
All of my examples are given with the assumption that you will make manual copies as well. If you assign this task to the Backup software, then you can ignore the sections where I talk about that.
The backup selections we have just set include your user profile(s) for the user(s) on your computer. That includes the files that are in your \My Documents folder, and other things like all of your email files if you are using Outlook or Outlook Express. If you take the defaults on most music software, all of your music will be stored in that location. I prefer to manage that manually as well, but I'm not going to show that here.
 If
there are any additional files that are not under the profile or \My
Documents folder, you should browse for them and select them at this time.
If you don't know of any, then just stick with what you have and go with
that. Let's save these selections as a backup job now.
If
there are any additional files that are not under the profile or \My
Documents folder, you should browse for them and select them at this time.
If you don't know of any, then just stick with what you have and go with
that. Let's save these selections as a backup job now.
Select JOB from the menu, and then select SAVE SELECTIONS. You will want to name your selection job something useful. I name mine, 'Primary Backup'. Go ahead and close the Backup Utility now and we'll step through how to run a backup from the beginning.
 When
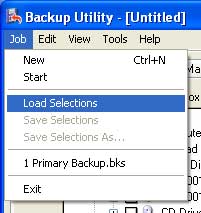
you are ready to make a backup, open the Backup software, click the Backup
tab and then click JOB on the menu and then Load Selections. A window
will appear, and you should see see the backup job that you just saved.
In the example below, it's Primary Backup.bks.
When
you are ready to make a backup, open the Backup software, click the Backup
tab and then click JOB on the menu and then Load Selections. A window
will appear, and you should see see the backup job that you just saved.
In the example below, it's Primary Backup.bks.
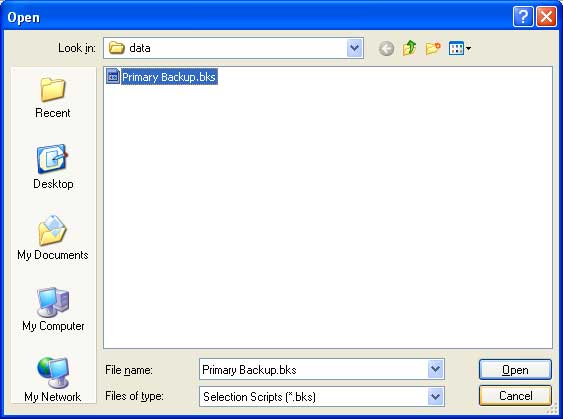 Select
the file, and then click OPEN.
Select
the file, and then click OPEN.
You will see that all the selections we saved are now selected again. The file name is also the same, and if you are going to make a redundant backup, you'll need to change this file each time so that it will go to the appropriate logical date folder in your BACKUP folder on your External Hard Drive.
As it is, the filename is correct for this backup, so go ahead and click the START BACKUP button and the backup will run.
That's all for the setup. As you can see, it's really not that difficult. On the next page we're going to talk about how to make all of these new found abilities work for you in the real world.
Shane